
Arduino Ghostbusters Proton Pack Lights Project

Make Ghostbusters Proton Pack Lights using your Arduino and a few components!
About this Project
In this project we'll make Ghostbusters Proton Pack Lights. You'll see the schematic, breaboard layout, and how to build the project.
The Arduino Ghostbusters Proton Pack Lights is a great project for beginners in Arduino, and for anyone who likes to construct and learn from unique and attractive electronics projects.
The 10 blue LEDs show the Power Cell strip progressing from 1 LED on up to 10 LEDs on, and the 4 red LEDs cycle around to show the Cyclotron lights.
This project is for the purposes of amusement and learning.
Full Step-By-Step Instructions Video
Watch the full step-by-step instructions video on YouTube:
Components for your Project
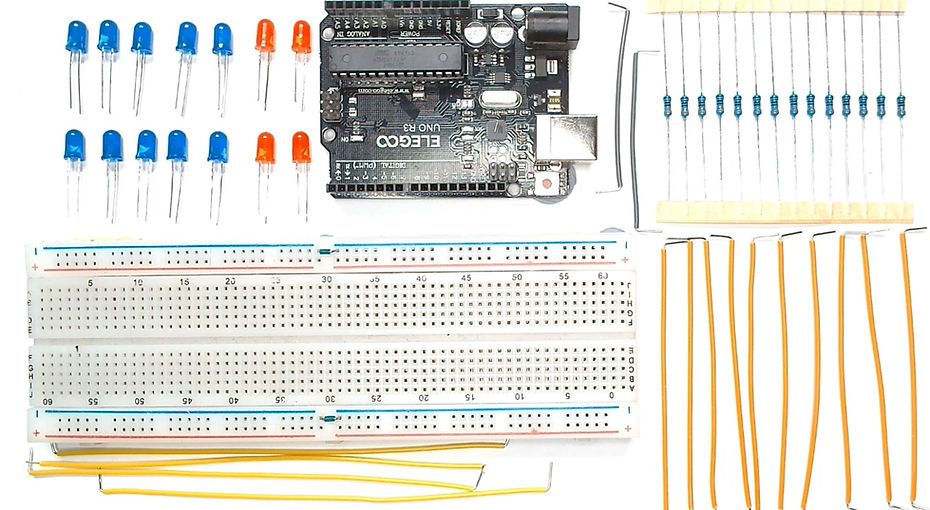
To make your project you will need:
-
An Arduino Uno or Mega. You can also use an Arduino Nano or any other Arduino type, but you might need to change the pin assignments for these in the software (this is easy to do)
-
A breadboard
-
Ten Blue LEDs for the Power Cell
-
Four Red LEDs for the Cyclotron lights
-
Fourteen 330 Ohm resistors. You can use any resistor values ranging from 330 Ohms to 560 Ohms.
-
Assorted breadboard jumper wires
Schematic Diagram
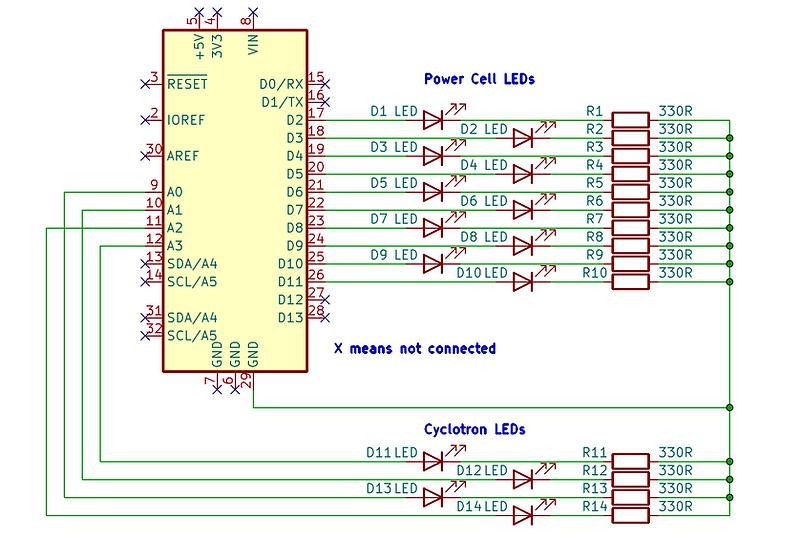
Arduino Port Pins D2 thru D11 are configured as outputs, and drive the ten LEDs to make the Power Cell lights.
Arduino Port Pins A0 thru A3 are also configured as outputs, and drive the four LEDs for the Cyclotron lights.
Each of the LEDs has a resistor in series with it which limits the current through the LEDs (without this the LEDs would be damaged).
The GND from the Arduino is connected to all of the LEDs via their resistors.
The remaining Arduino pins are not connected.
Breadboard Layout - Complete Project
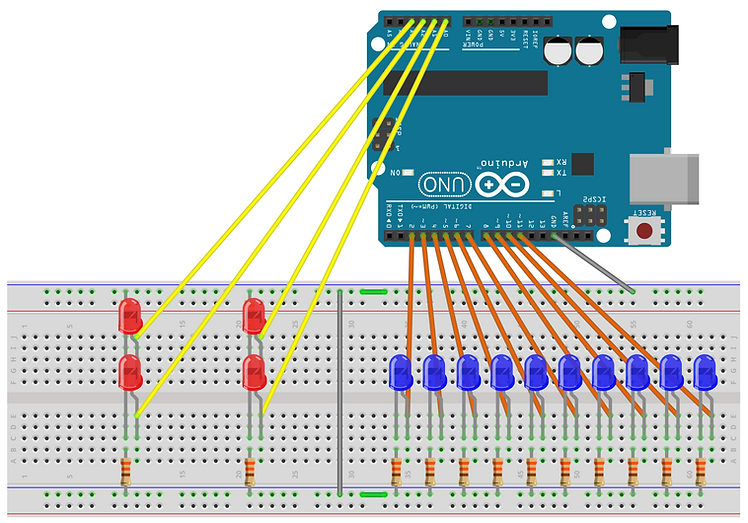
This picture shows the complete Breadboard Layout.
Some of the resistors and wires are obscured in this picture by the LED graphics.
Breadboard Layout - Without LEDs
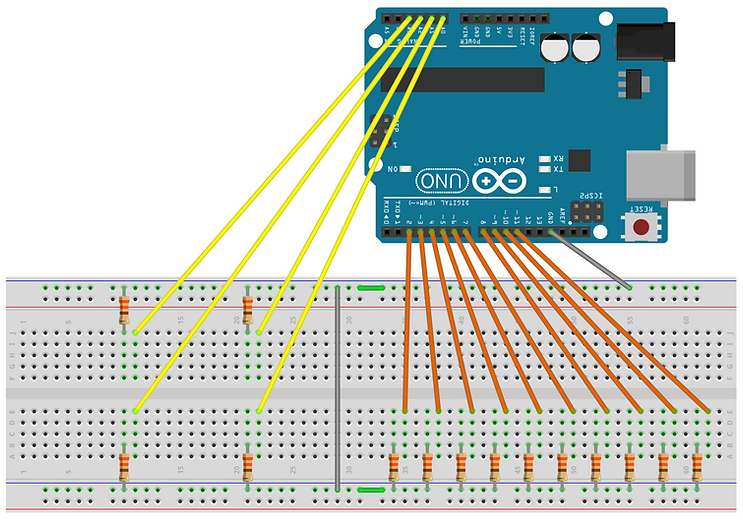
In this picture of the Breadboard Layout the LEDs are not shown, which makes it easier to see all of the resistors are wires.
Project Software
The project software is in file: ArduinoProtonPack.ino
The software can be compiled in the Arduino IDE and uploaded to your Arduino.
The software contains comments to tell you what it is doing.
You can change the software if you want to reassign the Arduino Port Pins, or you want to experiment with making the project do different things.
Your Finished Project
